Enormous stock photos can slow down your website—and hurt your rankings on Google. Learn how to size and compress any stock image you download.
“SEO” stands for Search Engine Optimization—on-page (e.g., content) and technical changes on a website to boost rankings on Google. We all know the old joke, “The best place to hide a dead body is on page two of Google.” There is some truth to this, however! A survey conducted by Moz in April 2019 found that only seven percent of searchers click to page two, three, or (dare I say) four of search results. As such, websites want to be at the top of page one!
A quick note: If you are eager to learn more about SEO (for free!), I recommend Moz’s Beginner’s Guide to SEO.
Okay, let’s get back to the post. It’s commonly known that Google uses around 200 signals (i.e., factors) to rank websites on Google Search. While they do not tell us all 200, SEOs have figured out the best tactics to boost rankings over the years, all of which are common elements of any SEO strategy. These include:
- Publishing relevant content consistently on your website that showcases your experience, expertise, authority, and trustworthiness (E-E-A-T)
- Building robust information architecture to keep your content organized and understood by search engines
- Having title tags (and meta descriptions) for each page
- Ensuring the mobile version of your website works flawlessly
- Improving the speed of your website (i.e., page load time)
- Adding links on your pages to other parts of your site (i.e., internal links)
These are typically the first areas companies tackle to optimize their websites to rank better on Google. There are many other signals, however! In this blog, let’s look at one factor of page speed: images. While adding pictures and other multimedia helps keep users engaged, it is easy to slip up and cause more harm than good.
Stock Photos Are Great…Until They Are Not
We are all familiar with copyright law and have learned by now that it is not okay to take a photo randomly from Google Images and place it on your site. Many companies have subscriptions to platforms like iStock. However, these stock photo subscriptions can be expensive! Luckily, there are plenty of free options online. My favorite is Unsplash, but Pexels is another common choice.
When organizations find a stock photo they love, they typically click the download button and instantly plop it on a webpage. However, have you noticed that stock photo images are often thousands of pixels (px) in size and can range upwards of ten or more megabytes (MB)? So, if you have a spot on your website that is 1000x800px, why do you need an image that is 4000x3200px? Short answer: you do not!
If thinking in pixels is difficult, think about this with a photo frame in a home. Imagine a frame in a living room that can hold a standard 5×7 photo. You would not print a 12×18 picture—it wouldn’t fit! So, when optimizing an image for the web, it’s good to start with the size of the spot on a website.
There are a few different ways to can do this. Tech-savvy marketers can use the Inspect Element feature in web browsers to see the rendered size of an image for a given spot on a website. The “instrinsic size” refers to the literal photo size, whereas the “rendered size” refers to what pixel area the image inhabits on the site. I have found through the years, though, that a simple rule of thumb can apply in most cases:
- 2000px wide, at most, for a hero or header image
- 1000px wide, at most, for any other image on your page
Additionally, I find it helpful to create templates in Photoshop (or whichever design software you use) to keep images looking consistent across your entire site, especially if you use page templates.
Large Images Can Slow Down Your Site
We have all had that moment when we click a Google search result or type a URL into the address bar where the page loads…keeps loading…still loads…and continues to load. The circle endlessly spins in the web browser, and it feels like we are watching Flash, the sloth DMV worker, stamp a paper in Zootopia!

We get frustrated and click the back button to find another website that works. We do not think much of this when we are users, but do you want this to happen when people click on your website? An article by Section details how nearly 10% of users will leave a website that takes more than two seconds to load. One out of ten users will bounce from a slow site, removing any chance of a conversion and hurting your rankings.
Plus, ever since Google incorporated the page experience update (i.e., how fast your website loads on mobile) as a ranking signal in the summer of 2021, it’s more important than ever to have a fast website.
It is important to remember that when a user accesses a website, their web browser has to load all of the content (viewable and unviewable) before showing the page. Over the years, web browsers have gotten much better at rendering (loading) pages faster. However, large image files mess with this. I try to follow a simple threshold when adding images to websites: a 350KB maximum file size.
Luckily, it’s simple to properly optimize your images before placing them on websites. Designers and marketers often use Photoshop to resize and optimize images, but this is an expensive option for business owners in Cleveland. Let’s look at how to do this with Photoshop and Canva, a free online graphic design program.
Let’s first decide what our final file type needs to be. When uploading an image to the web, there are two common file types: JPG (or JPEG) and PNG. Best practice says to export images for web as JPGs unless they need a transparent background (e.g., with logos). PNGs support transparent backgrounds, whereas JPGs do not. The reason that we ought to use JPGs all other times is due to PNGs being larger files in general.
“Save for Web (Legacy)” Will Be Your New Best Friend in Photoshop
For this example, I downloaded a photo of a color wheel. To begin, we can see the current size of the image in Photoshop. Clicking Image > Image Size from the menu bar shows this image is over 5,000px square! While in this window, let’s also check that the resolution is 72 pixels per inch (PPI). Often, stock photo websites will have images set to 300 PPI. Scaling this down to 72 will reduce the literal size of the image concurrently.
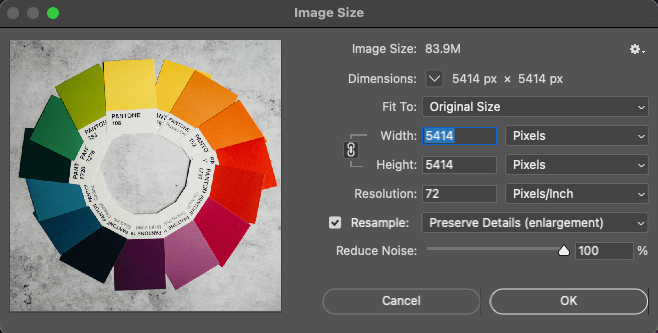
Also, when I look at my downloads folder, it shows that the current file size is over 6 MB, which is unnecessarily large since I only need it to be 1000px wide.
Click File > Export > Save for Web (Legacy) to solve this in Photoshop. Save for Web is a nifty tool that allows us to resize and compress images before exporting.
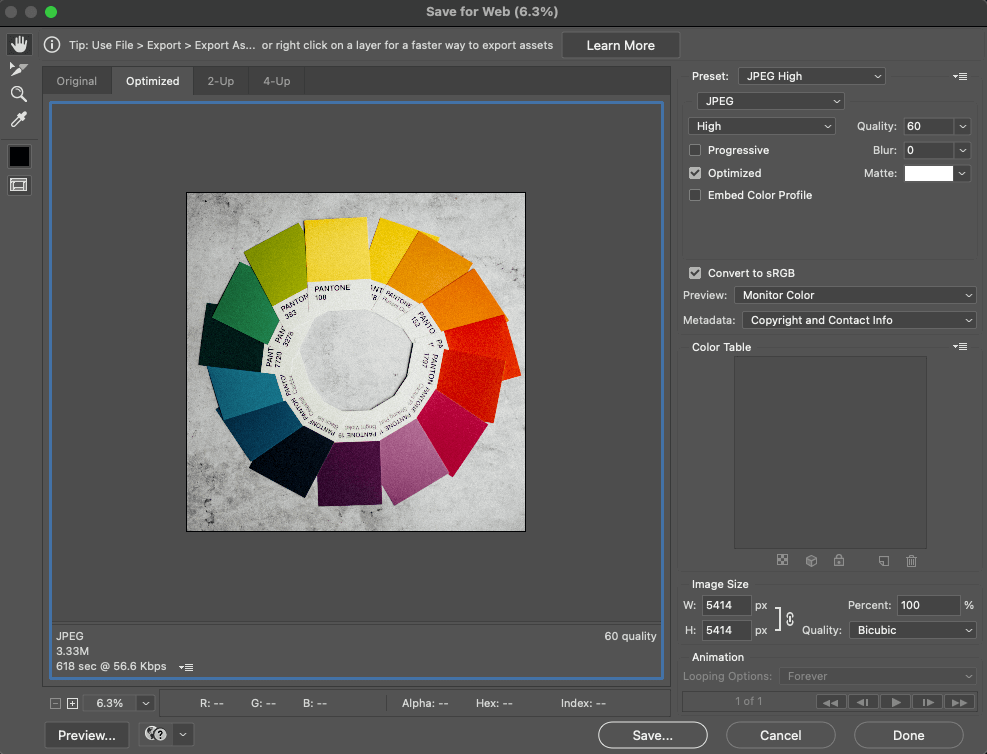
To start, choose the file type in the dropdown towards the top. Do not worry about using presets. Then, in the bottom right portion of the window, type in the size we need. I replaced the 5,414px with 1000px. If we leave that little lock symbol active, changing the width will automatically keep the height proportional, and vice-versa.
We can also use the quality slider to adjust how the image looks. The default is 60%. The lower this number is, the higher the chance a photo will be grainy. I’ve had good luck keeping it at the default 60%.
The next section applies to Canva, so you can skip it to get to the final step!
Canva Is a Great Free Tool
I taught myself graphic design using Canva before having the money to afford Adobe’s suite of programs. As such, I have figured out tricks to optimize designs in the platform. The difference between Canva and Photoshop is that we must know what size we need before creating the image. The free version of Canva does not allow us to resize our document after creation.
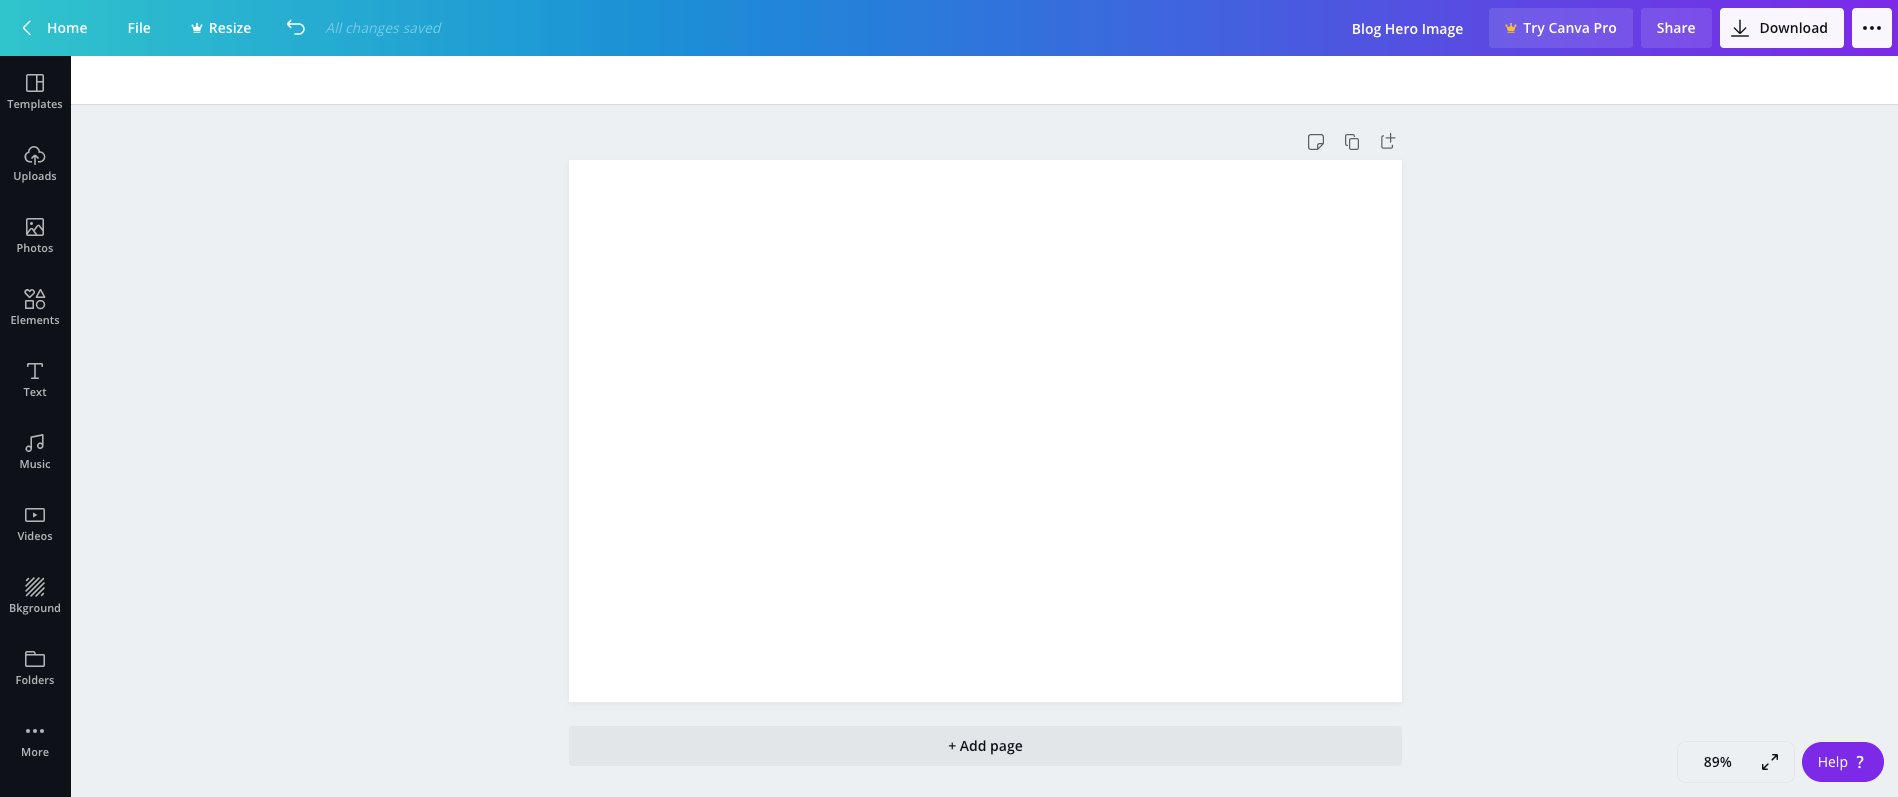
I created a canvas that is 1000px x 667px, as that is roughly the final size I need. If you do not know the exact proportion of your image, have a 3:2 ratio. So, for 1000px, I would make the other dimension 667px. For 1500px, I would make the other dimension 1000px, and so on. Once the document opens, I can add a grid from the elements menu. Then, upon uploading an image into the uploads pane, I can drag it into the grid, having it automatically fill it. Once done, click the download button and export as a JPG; the free version of Canva does not allow you to export a PNG with a transparent background, so there is no need to use PNG as the file type.
The Final Step Is to Say “Hi” to the Panda
There are so many free tools online—some amazing, some not. One of my favorites is TinyPNG, an image compression site that significantly reduces image file sizes without ruining image quality. When I add an image, it is common for over 50% of the image file size to get removed without making it look pixelated or grainy.
When we go to TinyPNG, we can upload the exported image from Photoshop or Canva. The platform will automatically compress the image. Once done, we can use this new image file on our website. A word of caution: the free version of TinyPNG does not allow images over 5 MB in size.
Today’s websites also offer the ability to (or automatically do) convert uploaded images from JPGs and PNGs to file standards built for the web (e.g., WebP). Check with your website provider to see if this is an option.
Spark's Three Takeaways
Avoid immediately uploading a stock photo to your website since it will be enormous.
Use tools like Photoshop and TinyPNG to compress and resize your stock images.
Keep all images under 350 kilobytes (KB) for optimal page speed, and consider using modern image files like WebP.